Technique: Sewing
Materials
base fabric of choice
ribbon, lace, trims
tacky glue
filling (either polyfill or herbal)
Tools:
sewing machine
scissors
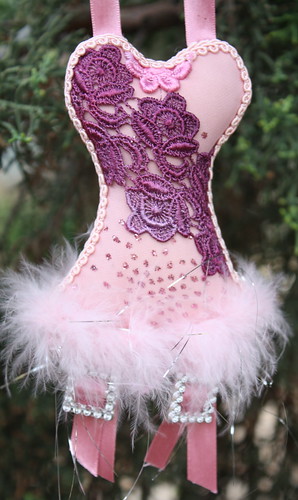
Many of the materials I used in this corset were remnants from my wedding dress (yes I wore pink).

With the base fabric right sides together, use template above to cut out two pieces.
Cut two lengths of ribbon about four inches in length. Fold and pin into place upside down on the right side, bottom edge of the corset to act as the garter straps. It's kind of hard to explain if you have no sewing experience, the folded edge of the ribbon will be flush with the bottom edge of the corset and the cut edges will be pointing up towards the bra section, so that when you sandwich it back together you will sew over the top of it and catch it in the seam to secure it. Then when you turn it right way out, the two garter straps will be danging down.
Cut a six inch length of ribbon and pin each cut end to a bra cup, loop pointing down, so that when turned right way out it acts as a hanging loop.
Place the other pattern piece, right sides together, over the top and pin into place being sure that the loose ends of the ribbons are not caught in the seams.
Sew, leaving an inch gap at the bottom. Clip curves, turn and stuff. You can stuff with herbs like lavender for a scented corset you can hang in your wardrobe, or use polyfill. Whipstitch bottom gap closed.
OK dull part over, fun part begins! Using tacky glue you can decorate your corset in any way you like. I added some feather boa at the bottom, and found two "buckles" to attach to the ribbons as garter clasps. Hand died lace and gimp braid added the finishing touches.
No comments:
Post a Comment